Pages

4 November 2010

Crunch time


Yes it’s that glorious time of year where everything gets just a little bit crunchy. The trees are changing colours and soon we’ll be wading through pavements and fields knee deep in crisp golden leaves, clear blue skies overhead and clouds of condensing breath in the air. The seasonal produce on offer from stores, markets and farm shops reflect the colours and hues of the season: golden and purple swedes, burnt orange pumpkins, moss-like kale leaves, frosty white leeks and deep green crinkled cabbage. It’s the time of year when traditionally our thoughts turn, quite rightly, to warming soups, stews, compotes and deep rich meats and game with distinctive earthy flavours but there’s still time for something a little lighter and fresher. In this crisp and crunchy salad-come-autumnal-coleslaw you'll find a refreshing, tangy, Asian twist that is the perfect compliment to the season. 

Try adding bean sprouts, noodles or both, maybe some stir fried crispy chunks of chicken or serve this coleslaw, as is, along side some roasted pork belly with crackling. The dressing would make a perfect marinade for fish too: sticky, sweet and sour.

Winter coleslaw with Asian dressing


Serves:4

  • ½ a cabbage, green or white shredded
  • 3 carrots coarsely grated
  • 2 apples grated
  • 1 red pepper finely sliced
  • 2 tbsp of crushed roasted peanuts

Dressing
·       1 clove garlic crushed
·       ½ onion finely chopped
·       1 red chilli chopped
·       1 tbsp of thai fish sauce
·       11/2 tbsp of brown sugar
·       3 tbsp of lime juice
·       a dash of sweet chilli sauce


Put all the raw vegetables chopped, sliced or grated in a large bowl. Mix all the dressing ingredients in a blender and blitz for a few seconds. Pour the dressing over the veg and toss well, serving with a sprinkle of the crushed peanuts.


2 November 2010

Smashing pumpkins


Halloween having just passed we naturally find ourselves with a slight excess in the pumpkin department: even though the living room is abundantly decorated with triangular cut, slanty eyed faces that the kids have enthusiastically carved, glowing and glowering, on shelves, mantles and in obscure corners, the room is filled with an autumnal aura … and an acrid smell of burning vegetable flesh. Every year I try to ‘do’ something with pumpkin, I’ve experimented with pumpkin pies, pumpkin soups, roasting and mashing the golden flesh, but have come to the conclusion that none of the above really excites me that much. Pies are often glutinous and any pumpkin flavour is masked by nutmeg and cinnamon, not a bad thing as it turns out, but then I question as to why include the pumpkin in the first place. Soups are never quite ‘there’ for me: I only once had a decent soup but again the over riding flavour was celery this time, whilst warming and an attractive colour the pumpkin seemed to be lurking around rather than bursting out. Lets face facts, pumpkin isn’t the worlds most flavoursome ingredient: despite being one of the most popular crops in the United States of America where about 1.5 billion pounds are cultivated each year. It does however have quite an interesting texture if handled in the right way and this year I stumbled upon a pasta recipe that seems to finally do the pumpkin proud. The trick is to roast thick slices of pumpkin with the skin intact then, when tender and almost cooked through, scrape the flesh into a sieve or colander and let it drain and dry overnight (for at least the best part of the day). The true genius in this recipe though is the way the pumpkin flesh, now mashed coarsely, is combined with pear and parmesan cheese and a little garlic to create a tangy, sweet, textured and delicious filling for tortellini pasta. Squash and pasta are old and well acquainted partners; think of butternut and sage for instance, both as a filling and as a fantastic variation for gnocchi. This recipe for the pumpkin is similar in the fact that the dish is finished with a smoky sage and butter sauce but the texture and the fresh fruity finish are quite unique. 

Pumpkin & pear tortellini


Serves: 4

For the filling- the day before

  • 1 pumpkin, about 2kg
  • 100g grated fresh parmesan cheese
  • 100g pear flesh, grated
  • 1 clove garlic, crushed
  • Salt & pepper

For the pasta
  • 300g tipo ‘00’ flour
  • 3 eggs
  • 1 tspn of turmeric

For the sauce
  • 100g butter
  • A handful of sage leaves
  • Half a cup of vegetable stock


Cut the pumpkin into wedges, deseed and place in a roasting tin, sprinkle with salt and roast at 180degrees for about 45 minutes or until just tender. Allow to cool and then scrape the pumpkin flesh into a sieve or colander, place a plate or saucer on top and rest in a bowl to allow any excess liquid to drain from the flesh. This should be left for at least 5 hours but if the pumpkin seems very wet then leave to drain overnight. When thoroughly dry place the pumpkin flesh in a bowl and coarsely mash or place in a blender and blitz. Add the Parmesan cheese, pear, garlic and season well with salt & pepper.


There are so many pasta recipes so find one you can work with, the process and technique is pretty standard, I add the turmeric to give the pasta a deep yellow colour. Fill your rolled out pasta with the pumpkin filling, shape into tortellini and leave to air until needed. Cook in plenty of boiling salted water for about 4 mins. Melt the butter in a frying pan; add the sage leaves and fry for a minute, splash in the stock and season. When cooked toss the tortellini in the sage butter sauce and serve immediately.

27 October 2010

Riverford at Pines Gardens


Dover, Kent was the location for the latest demonstration for my friends at Riverford organics , the veg box people. Once again we were inspiring new ideas and some innovative methods of cooking some of the , well , less exciting veg that heralds in the new autumn season, the much maligned Swede for instance. Autumn also has a treasure-trove of delights in store and is quite possibly my favourite food season. Much as in spring when purple sprouting broccoli is available for the first time , Kale brings a similar frisson of excitement with it's arrival in the weekly box. This week it was the deeply gorgeous long leaves of Cavalo Nero but soon curly Kale will be in abundance and I shall indulge.

The main focus of this weeks demonstration was Swede though and sage seemed to be the appropriate partner. Try roasting Swede seasoned with salt and pepper, some chopped sage leaves and roasted in the over for 20 minutes or so and serve as an alternative to roast potato. Using a very similar method , only chopping the Swede into more delicate pieces a risotto of roasted Swede and sage butter drizzle was a real hit with both lovers and haters of this golden and fleshed root.

Roast Swede and sage risotto


Serves: 4
  • 250g Arborio rice 
  • 750ml Vegetable stock 
  • 3tbsp olive oil 
  • 1 white onion finely chopped 
  • 1 celery stick, finely chopped 
  • 150g grated parmesan cheese 
  • 1 garlic clove crushed 
  • 1 lemon juiced 
  • 1 glass of white dry wine 
  • 30g butter 
  • Salt & pepper 

Heat the oil in a heavy based pan and gently fry the onion & celery for a few minutes. Add the crushed garlic clove stir in for a minute or two and then pour in some more olive oil and add the rice. Cook the rice for a few minutes until the rice absorbs some of the oil and starts to puff a little. If you are using wine this is the time to add it to the pan and heat until absorbed into the rice. Now start adding the stock, just cover the rice and stir whilst it is absorbed and then repeat. Keep cooking until the rice is nearly done but still a bit ‘husky’ and now add the lemon juice, season with salt & pepper and keep cooking adding more stock as required until the rice is al dente. Remove from the heat, stir in the Parmesan cheese cover and let it sit for five minutes, before adding flavourings.

Roasted Swede & sage: 

  • 1 medium Swede 
  • a handful of fresh sage leaves 
  • a few spinach leaves , washed and dried 
  • olive oil 
Cube the Swede into 1cm pieces, drizzle with olive oil, season and add a handful of chopped sage leaves, mix together and roast in the oven at 180 degrees for 20 mins or so. Add the roasted Swede to the risotto with a handful of spinach leaves and while the risotto is resting, fry some sage leaves in butter until crisp. Serve the crisp leaves on top of the risotto and drizzle with the butter.

Event photos by Chrissy Asteraki-Speer

6 October 2010

Humble roots


We had a bit of a glut this week, Carrots, that most humble of root vegetables, they seemed to be everywhere. We hadn’t even started on the bunch that came in last weeks veg box when another bunch turned up all fresh and perky in this weeks offering. There were a few still left over from the week before and in a major failing of my faculties I actually bought yet more whilst out food shopping; just because they were the right shape, you know those delicious little baby Chantenay carrots, I wanted them for a version of Coq-Au-Vin I was cooking mid week and thought they’d look good in the dish. So due to this slight over run of the gloriously humble Daucus carota I found myself searching around for a few recipes to appease, not only my shopping guilt but the excess.

There are of course many ways to cook a carrot and nothing better than to boil until just tender, drain and then glaze with butter, a little sugar and serve sprinkled with fresh chopped Parsley. We call these ‘naughty carrots’ at home and in a stroke of genius and by employing a degree of psychological warfare the kids were wooed into eating them by simply designating them as ‘naughty’ (due to the sugar & butter content), all kids like something naughty and this system worked a treat and we still refer to this dish by the same name today. In an aside to this: we once convinced my son, probably aged two (poor lad had no idea) that sparkling mineral water was ‘white coca-cola’, another battle won by simple psychological techniques, worked until he went to nursery school and started mixing with other better informed children who were already indoctrinated in the delights of ‘the real thing’!

There is always a soup I suppose, a classic way to relieve oneself of an overflowing supply of vegetables, but today I fancied something a little more tantalising and something to accompany some slow roasted lamb shoulder that was oozing and spitting in the oven. I was thinking of a Greek flavour or an exotic North African spicing that would go perfectly with the lamb. Once again Ottoleghi’s Plenty came to the rescue with a very simple Moroccan spiced carrot recipe that I instantly suspected could be adapted in several ways. The basic idea was simple, we like that, par-cook the carrots, fry some onion and spice these with cumin, cinnamon, ginger, cloves, chilli and garlic, return the carrots, stir together and eventually serve with some fresh coriander and an indulgent dollop of Greek yoghurt drizzled with your best olive oil.


Moroccan spiced carrot salad


Serves: 4

  • 1 kg carrots 
  • 100 ml olive oil 
  • 1 onion finely chopped 
  • 3 cloves of garlic 
  • 2 green chillies 
  • 1 pinch of ground cloves 
  • 1 pinch of ground ginger 
  • 1 pinch of ground coriander 
  • 1 tsp of ground cinnamon 
  • 1 tsp sweet paprika 
  • 1 tsp ground cumin 
  • 1 tbsp white wine vinegar 
  • 1 tbsp of chopped preserved lemon skin (if you have it or the grated zest of a lemon 
  • Juice of 1 lemon 
  • 1 handful of fresh chopped coriander 
  • Greek yoghurt to serve 
  • Salt & pepper 
Wash, peel and cut the carrots into 1cm thick batons about 3 cm in length. Cook in slowly boiling salted water until just tender but retaining some degree of crunch. Drain and allow to cool.


In a frying pan soften the onion in olive oil until just starting to colour, sprinkle in all the ground herbs, the chopped garlic, finely chopped chillies, white wine vinegar and lemon zest and continue cooking for a few minutes until all the flavours are combined and the onion is browned and golden.

Return the carrots to the onion mixture and mix thoroughly so all the carrots are coated in the onions and spices. Remove from the heat and allow to cool. Just before serving stir through the chopped coriander and serve in individual bowls with a spoon of Greek yoghurt and a drizzle of olive oil.


I was cooking at a music festival the other week and used this basic recipe to create a couscous dish that could be pre-prepared and taste good all day. It turned out to be a real hit and I have prepared it a few times since. It follows the same basic principles as the Ottolenghi dish above but combines couscous, mint & raisins to make a sweet and spicy warm (or cold) salad that is great as an accompaniment to meats or is an ideal lunch box recipe.


Moroccan spiced carrot couscous


Serves: 4

  • 1 kg carrots
  • 150g couscous
  • 100ml olive oil
  • 1 onion finely chopped
  • 3 cloves of garlic
  • 2 green chillies
  • 1 pinch of ground coriander
  • 1 tsp of ground cinnamon
  • 1 tsp ground cumin
  • Juice of 1 lemon
  • 1 handful of fresh chopped coriander
  • 1 handful of fresh chopped mint
  • 1 handful of the best raisins you can afford
  • Salt & pepper

Wash, peel and cut the carrots into 1cm thick batons about 3 cm in length. Cook in slowly boiling salted water until just tender but retaining some degree of crunch. Drain and allow to cool.

In a frying pan soften the onion in olive oil until just starting to colour, sprinkle with all the ground herbs, the chopped garlic, finely chopped chillies and continue cooking for a few minutes until all the flavours are combined and the onion is browned and golden.
Return the carrots to the onion mixture and mix thoroughly so all the carrots are coated in the onions and spices. Remove from the heat and allow to cool.

Put the couscous in a large bowl, sprinkle with salt and cover with boiling water. Put a lid on the bowl or cover the bowl with cling film and leave to stand for 10 minutes. After ten minutes ‘fluff’ the couscous up with a plastic fork and drizzle in a little olive oil and lemon juice just to help the grains separate. Stir in the chopped mint and coriander, season to taste with salt & pepper and add more lemon juice if required. Now add the carrots and onion mixture and the raisins and stir all the ingredients together. Adjust the seasoning to taste, add more chopped herbs and lemon if required then place in into a large serving dish.  


8 September 2010

Get with the Beet !


Second helpings are always a good thing and there is no exception in the case of the deeply delicious beetroot. Normally and probably quite rightly one associates the deep earthy flavours of this particular purple bulb with the autumn, but in fact these roots are available pretty much all year: bar a brief holiday from April till June. It therefore comes as a complete delight to find what appears to be a second crop available just now, but this is really the beginning of the season that began in late June and will now continue through till next February or even March. The beets available now are smaller, sweeter and cook more easily than those larger ones available in the winter month’s, which can sometimes have a tough woody core.


There are many ways to prepare and eat beetroot but I find the best place to start no matter what recipe I am intending to follow is to roast the beets in the oven until tender and from there I can do what ever I so desire with ease. I have noticed that many cook books instruct a roasting of around 45 minutes, this in my opinion is a complete fallacy, I can’t remember ever being able to roast a beet from raw to tender in this time, an hour and a half maybe, but never much less than an hour, so bear this in mind before starting any recipe involving beetroot.

My preferred method is quite simple, produces a deep rich colour, flavour and velvety texture, let alone a delicious aroma that will fill your kitchen making you instantly and ridiculously hungry. Simply remove most of the roots and stalks from the beets, scatter a good handful or two of sea salt on the bottom of a large sheet of foil, place the washed and dried beets onto the bed of salt, wrap the foil up tightly and place on a tray in a preheated oven at 180 degrees. As I said you can expect this process to take around 90 to 120 minutes depending on the size and age of your beets. You can always test them with a skewer after an hour and see how they’re doing. When completely tender, allow them to cool and then rub off the skins with your fingers ( wear some rubber gloves if you don’t want stained fingers) and trim off the stalks and roots.

Now you have a delicious cooked beet that can be added to salads, pan-fried with carrots and balsamic vinegar, made into deep velvety soup that can be eaten hot or cold and even used to make a surprisingly good, moist cake.

I am a huge fan of the beet and find it a complete joy to cook with. I love the way it partners so well with fruit and in these two recipes I do exactly that. The soup is a delicious alternative to Borscht, the apple lightens and sweetens and this version is equally good hot or cold. The salad is simply wondrous, tangy, salty (from the olives) and sweet from both the beets and the fruit. It looks quite stunning too and is super simple to make.

Beetroot , orange and olive salad


Serves: 2
  • 400g beetroot 
  • 2 sweet blood or blush oranges 
  • 50g black dried pitted olives 
  • ½ a small red onion very finely chopped 
  • 1 tbsp red wine vinegar 
  • 3 tbsp olive oil 
  • Flat leaf parsley chopped 
  • Salt & pepper 

Prepare the beetroot by washing, trimming off the long stalks and sitting them on a bed of sea salt wrapped up inside a piece of foil. Place them in a pre-heated oven at 180 degrees and roast for at least 90 minutes or until completely tender when pierced with a skewer or sharp knife. Allow to cool for a while, and then remove the stalks and skins, slice into wedge shape pieces and place in a large mixing bowl.

Cut the skins from the oranges by slicing off the ends and cutting down the sides of the fruit to reveal the flesh, thus removing any pith, cut out the segments of orange from in-between the membranes and put the segments and the juice in the same bowl as the beetroot.

Add all the other ingredients: olives, onion, olive oil, red wine vinegar and chopped parsley to the bowl, mix the salad together, season with salt & pepper to taste and serve on a large platter. 


Beetroot, apple & celery soup


Serves: 4

  • 1kg Beetroot (roasted)
  • 500g Apples
  • 1 large onion
  • 1 Celery stalk
  • 200ml white wine
  • 1 tbsp Demerara sugar
  • 1.5ltr vegetable or chicken stock
  • 2tbsp olive oil
  • Salt & pepper
  • Crème fraiche
  • Chives


Wrap the beetroot in foil and roast in the oven at 180 degrees for an hour or until tender, peel the skins off the beets and slice. Sweat the onion and celery in a large pan in a little olive oil. Peel, core and slice the apples add these to the pan and cook down for a while. Add the sugar, white wine and cook for a few minutes more until all the ingredients are combined. Pour over the stock, season and simmer gently until everything is thoroughly tender and cooked through: about 30 mins. Allow to cool for a little while and then place in a food processor and blitz into a smooth soup. Return to a pan, heat gently and then serve with a swirl of crème fraiche or sour cream and a scattering of finely chopped chives or dill if preferred. This soup is excellent served chilled.


26 July 2010

More green issues ...


Baking has never come completely naturally to me, not like my mother or grandmother who both seem to bake so effortlessly, no, it has always been a bit of a recipe following exercise as far as I am concerned. Bread I’m OK with, I’ve practised enough to have developed a ‘feel’ for it and I like the scientific element to the whole process. So I was somewhat surprised in myself as to why I was drawn to these little pancakes when I was looking for something new to try.

It started with a beautiful bunch of organic Spinach that had arrived on my doorstep courtesy of my weekly Riverford veg box. I was browsing through the cook books to find something interesting and new to do with this wonderful bag of bright green leaves, when I stumbled upon this recipe in my new Ottolenghi book Plenty. For some reason this recipe just jumped off the page, not too fussy and plenty of room for a more rustic method, and so, as if by fate, green spinach pancakes it was!

I was considering augmenting these delightful pancakes with some chopped up bacon or pancetta but in the end I left well alone and followed the recipe. These would make a great brunch or breakfast dish, served with a tomato relish maybe, or just eat them straight from the frying pan as I did, fold them in half and munch like a sandwich, absolutely delicious!

Green Spinach pancakes
(from Ottolenghi Plenty)


Serves: 2

  • 300g spinach
  • 1 egg
  • 1 tsp cumin
  • 4 spring onions chopped
  • 1 green chilli chopped
  • 150ml milk
  • 110 self raising flour
  • 1 tbsp baking powder
  • 50g butter, melted
  • Sea salt
  • 1 egg white
  • Olive oil

Wash and dry the spinach then wilt in a dry pan over a medium heat. When soft place the spinach in a roll of kitchen paper and squeeze out as much water as possible. Lay the spinach out on fresh paper for a while then roughly chop and set to one side.


Place the flour, baking powder, whole egg, salt, cumin, in a bowl and whisk until a smooth. Add the chopped chilli and spring onions and stir into the pancake mix. Now stir in the spinach and season well, then, whisk the egg white to stiff peaks and fold this into the pancake batter.

In a hot non-stick frying pan drizzle some olive oil and add two tablespoons of the pancake mixture into the fat. Pat down a little so the pancakes don't get too thick and cook more evenly. Fry for two minutes on each side until golden and cooked through. This recipe makes about 6 pancakes.


25 July 2010

You could call this Ratatouille


Aubergine, Courgette and Tomato, such a classic combination of ingredients, used all over the world by different cultures to produce stunning full flavoured dishes that never disappoint. This is a really easy and somewhat refined version of a Ratatouille, but by cooking each ingredient individually it retains much more of each elements intrinsic qualities.


Ratatouille ... my way


  • 1 Medium Aubergine
  • 2 Courgettes
  • 200g Cherry Tomato 
  • 1 glass of white wine
  • 1 tbsp of tomato puree
  • 100 ml water
  • 1/2 a garlic clove , crushed
  • 1 tbsp of chopped flat leaf parsley
  • 1 tsp of dried oregano
  • 1 tsp sugar
  • olive oil
  • salt & pepper
Cut the Aubergine into thick chunks and fry in a little olive oil in a very hot pan until they are charred but not burnt, set to one side on a piece of kitchen paper.


Slice the Courgette into batons and in the same way as the Aubergine fry the batons until brown and golden . Set aside on a piece of kitchen paper


In a saucepan over a medium heat put the white wine and tomato puree, stir well together and cook off the wine for a few minutes. Add the sliced cherry tomato's, crushed garlic, sugar, dried oregano and season well. Top up with a little of the water as required and simmer down for a few minutes to thicken.


Now stir in the Aubergine and Courgette, toss around in the sauce, place a lid on the pan and gently simmer , stirring once, for 8-10 minutes. Keep an eye on the pan though as you don't want the vegetables to over cook and lose their colour and texture. Stir in some chopped parsley just before serving in a big bowl. Great as a lunch dish with crusty bread , a terrific side to slow roast lamb or as a salad.


24 July 2010

Going green


Having been on the road for the last two months on various photographic assignments in the USA, Canada, Scotland and Ireland I have returned home with what might be described as an attack of scurvy. It’s not exactly a case of an ancient maritime disease but I’m convinced it’s not far off. I’m craving green. Is it really so impossible to eat healthy food whilst travelling on the highways and byways of North America and the UK, it would appear so. Many of the cities I visited have a plethora of healthy food outlets I’m sure, you just don’t see them when you’re on the road and like many other travellers there just isn’t the time to make detours into a city to satiate a hunger and so we all just have to make do with what’s on offer. Chain Restaurants, sandwich bars and coffee shops. Most of the American roadside stops feature the familiar delights of Starbucks, Taco bell, Arby’s, pizza this and pizza that as well as the usual array of awful hamburger joints. Everything is served in ridiculously large portions, it’s full of fat, salt and sugar. No I don’t want to ‘go large’ thank you very much. Even in the UK the best you’re likely to procure is an M&S sandwich, maybe a salad and a portion of sweaty sushi which I will admit is a vast improvement on what our American counterparts have to offer but the whole experience is so lacking that inevitably it just becomes a ‘fuel’ stop.

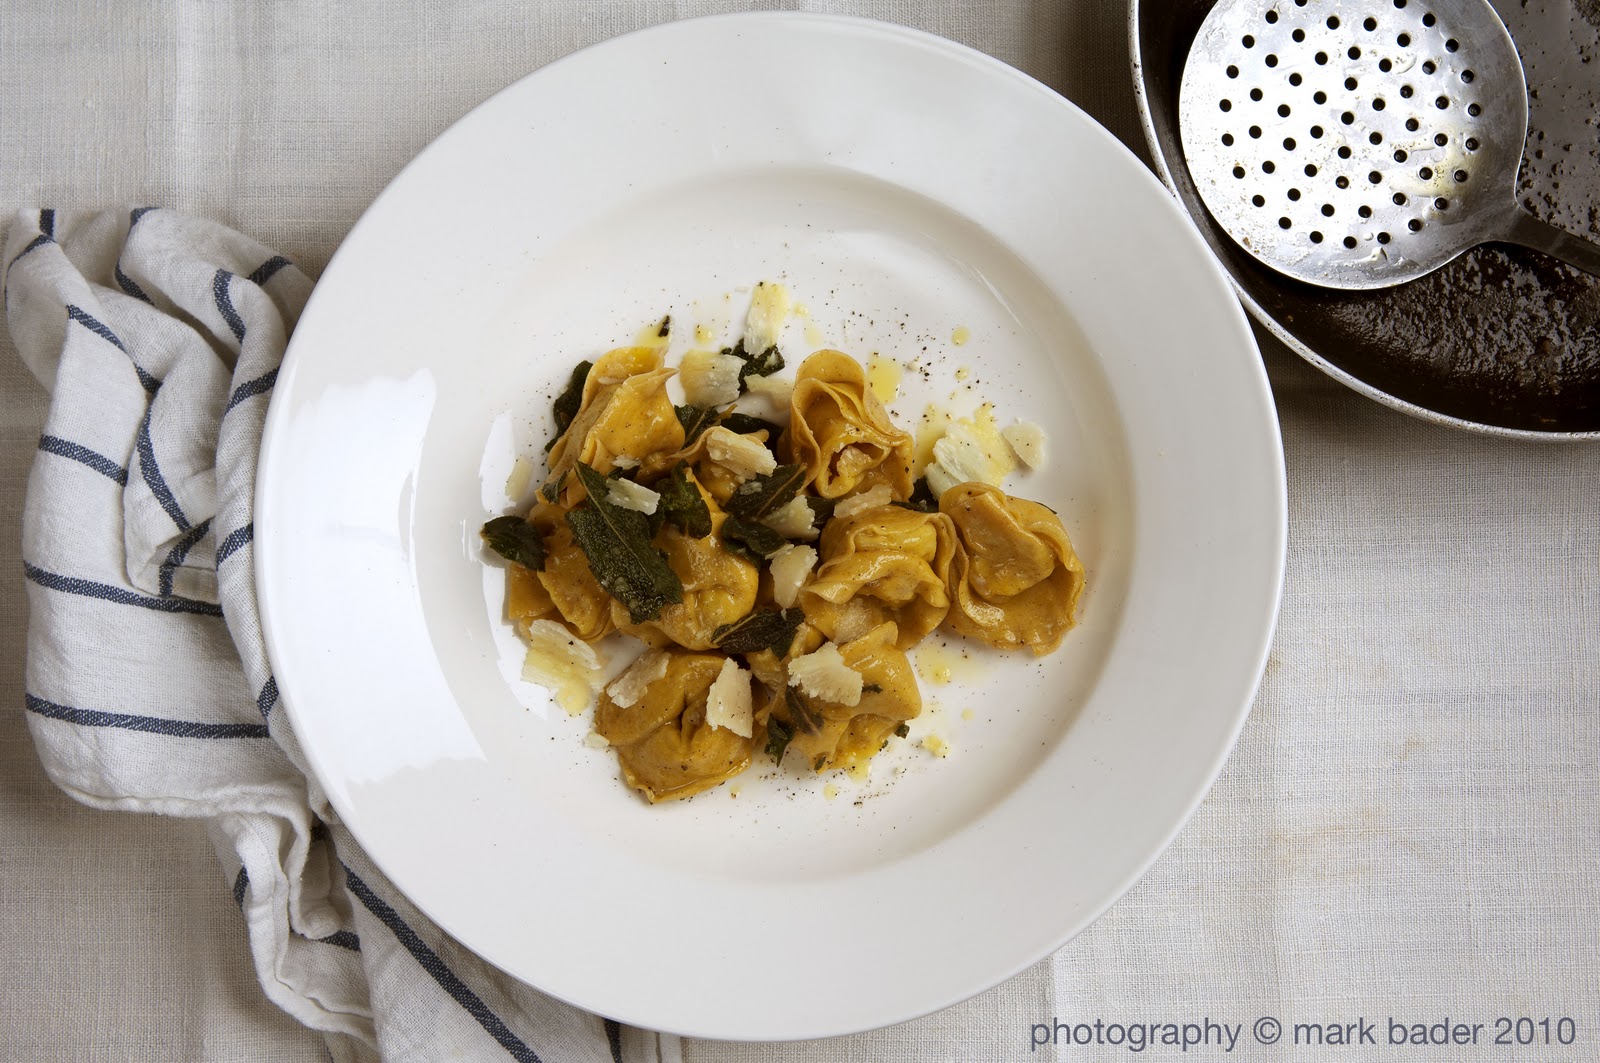
So life on the road has left me wanting and to be quite honest, a little bit weightier. Nothing therefore could have been a more fitting antidote and a source of inspiration on my return than to pick up a copy of the new Ottolenghi book Plenty. The pages are bursting with beautiful images of delightful food. The sort of recipes that excite the palate, tickle the taste buds, inspire new culinary challenges and frankly kick any threat of scurvy right into touch. Why couldn’t someone open a motorway cafĂ© based on this kind of fresh, seasonal, vitamin packed and downright tasty food. How amazing would it be to walk into a service station and be hit by the fragrant smells of garlic, mint, lemon, cinnamon and see spread out in a clean well lit and comfortable environment, huge colourful platters of couscous, trays of roasted Mediterranean vegetables, slithers of perfectly cooked roast beef, fish, something as simple as marinated buffalo mozzarella with roasted tomato, fresh humus, lentil salad, great breads, cakes and bowls of fruity compote. It couldn’t turn out to be any more expensive than the fleecing your wallet gets for a soggy sandwich and a coffee, that doesn’t even taste of coffee. There must be a demand for it out there, somewhere. Surely the concept here is fast food, not fastfood.

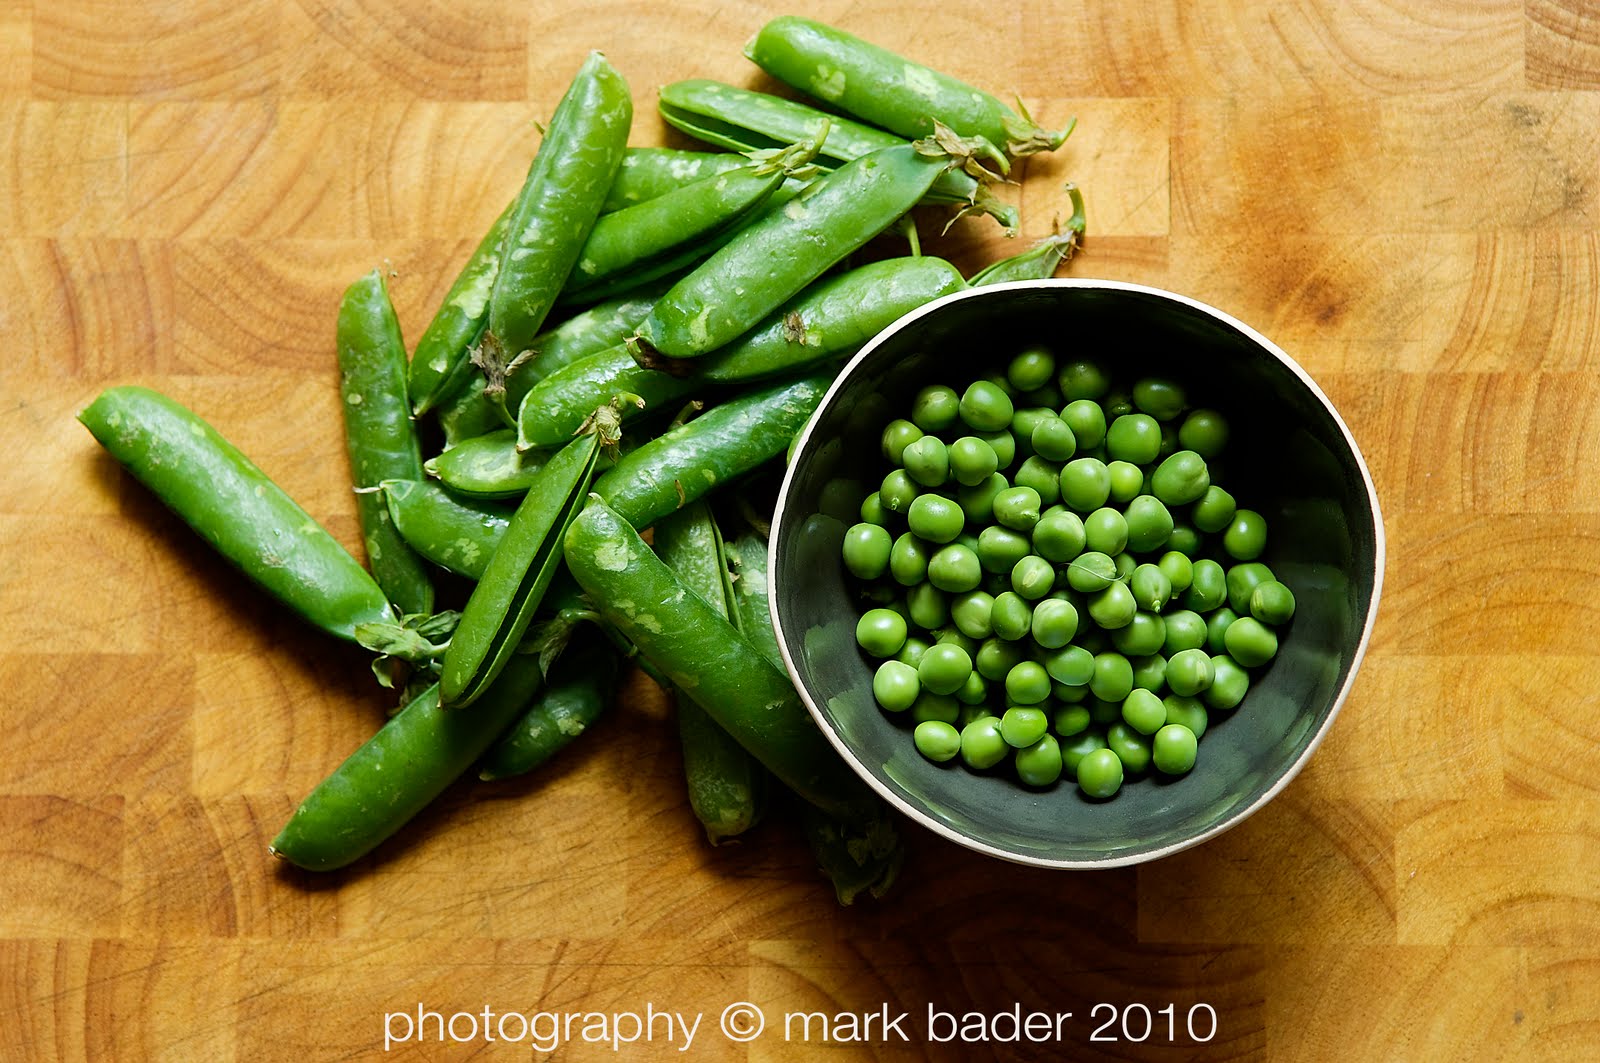
My return to the UK also happens to coincide with some lovely produce coming into season. Broad beans, garden Peas, Courgette, Aubergine, Spinach, Salad leaves, green beans, Turnips and Watercress. None of these need any degree of lengthy cooking, blanch, griddle, sear, sweat or steam, served in interesting combinations as stand alone dishes or as sides. All are easily adaptable and in this Couscous recipe I have added the peas and Broad beans to the original recipe to give a nutty texture.

Green Couscous with broad beans and peas


Serves:4

  • 150g couscous
  • 160 ml boiling water / stock
  • 1 small onion
  • 2 tbsp olive oil
  • ½ tsp ground cumin
  • 50g toasted pistachio nuts crushed
  • 3 finely chopped spring onions
  • 1 fresh green and red chilli, deseeded and chopped
  • 50g rocket chopped
  • 150g broad beans (shelled weight)
  • 150g fresh peas (shelled weight)

Herb salsa

  • 20g parsley
  • 2 tbsp dill
  • Chopped mint, a handful
  • 1 clove garlic
  • Olive oil
  • lemon juice to taste
  • Salt & pepper

Blanch the shelled broad beans in boiling water for a few minutes, drain, plunge into cold water and set aside then pop them out of their shells by making a small pinched hole in the rounded end and squeezing out the bean with a thumb and forefinger.


Do likewise with the shelled peas. 

Fry the onion in a little olive oil until golden and soft, sprinkle with a little cumin and set to one side.


Blitz the ingredients for the herb salsa in a food processor until smooth. 


In a large bowl place the couscous and add a tbsp of olive oil, then cover with boiling water or stock, cover with cling film and leave to stand for ten minutes. When ready, fluff up the couscous with a fork and add a little olive oil and stir through.

Now add the chopped nuts, chilli, spring onion, rocket, cooked onion, broad beans and peas to the couscous and 
gently stir in, add the herb paste and lemon juice, season well with salt and pepper, stir through a couple of times. Serve on a large platter.


20 May 2010

The lunch bunch


Ok, it was brunch actually but anytime is a great time and there’s no time like the present to enjoy some English asparagus. It’s only here for a brief moment, from the end of April until the end of June if we’re lucky, so grab it while you can and indulge. Asparagus is such a treat and such a beautiful specimen, it’s no wonder it holds such high revere in some of the best restaurants, they make a real song and dance out of it, but we can just dunk a simply cooked spear in a boiled egg if the mood so takes us.

There are many ways to cook this nutritious vegetable that contains more folic acid than any other vegetable available, delivers a good dose of vitamin A & C as well as having antioxidant properties, so you don’t want to over do it. My favourite method is to drop the spears into boiling water for just about a minute, drain and scatter on a baking tray, drizzle with olive oil, a little sea salt and cook in the oven for 7 mins on 220 degrees. Serve with a squeeze of lemon, some more olive oil and maybe a shaving of Parmesan.


Today I had some lovely Bury black pudding in the fridge so I sliced it thinly and fried till crisp, cooked the Asparagus as above and served with a perfectly poached egg. Some roasted tomatoes wouldn’t have gone a miss either. A dribble of hollandaise might have been gilding the lily, but would have been delicious nevertheless.


Last Wednesday was Asparagus risotto with peas, mint and parsley. I only used the tips for this dish so the remaining stalks were shaved paper thin with a potato peeler and incorporated into a salad of similarly sliced courgette and celery with some lambs’ lettuce and a chilli, lemon & garlic dressing.

Equally, three or four spears wrapped in wafer thin rashers of pancetta with an anchovy stuffed in-between, drizzled with olive oil and roasted in the oven makes a great stand alone dish or an alternative accompaniment for fish of meat. 

Best eaten on day of picking, or purchase, it’s not necessarily true that the thinner, slender spears are the most tender. Fat ones are good too, so don’t pass them by, it’s all to do with the skin to volume ratio apparently, like so many things in life!

14 May 2010

Can we talk ... Rabbit


The game season is one of the most exciting and flavoursome culinary events in the calendar and coincides with the best of the years’ mushrooms, earthy vegetables and fruit. The 12th of August heralds in the grouse, 1st of September the Partridge and from then until Christmas, when plump little pheasants are plentiful and at their tastiest, local markets are resplendent with displays of birds, hares and venison. By the end of January the season is all but over and for true game lovers a long layover is ahead. There is, it has to be said, a good deal of farmed game available these days but you just can’t beat the true taste of the wild.

My particular love of game was inspired by my fathers’ own obsession. Pheasant has always been a feature of an autumnal repast and usually a couple of brace had been lodged in the freezer so in the dwindling months between season the wafting aroma of a pheasant gently turning on the spit in the kitchen was a mouth watering delight. Hare has always been a another family favourite and I remember cooking it myself for the first time, slowly marinating and then roasting some saddles, prizing the mignon off the bone and serving the rich, fudge-like meat in a deep gravy infused with juniper and red wine. Game meat always feels special, a treat and something to be savoured. So whether pheasant, partridge, venison, wild boar or hare, during the game season a frisson of excitement sweeps through the house. I recall one Christmas when stuck for inspiration as to what on earth we could bestow upon dad as a present (my father is a man who would rather annoyingly have already purchased the latest book, cd or gadget only weeks previously, leaving us all floundering for gift ideas) that we had the ingenious thought of buying him a joint of venison. A large and very beautiful saddle of venison was duly procured from a local butcher, presented a few days early and devoured with gusto for Christmas lunch.

So now it’s May, wintry thoughts long dispatched and summer is lurking just around the corner. The larder is full of the new seasons offerings, the woods are carpeted with bluebells and spring lamb is on the butchers slab. It was with delight then, whilst wandering through the stalls, marquees and stands at a local food festival the other week that I happened upon the Chanctonbury Game company, purveyors of all things gamey, they had a small tent, a little oasis amongst the jams, chutneys, cheeses, vegetables and oddly, Thai noodle stalls that seem to frequent such events. Here in a couple of fridge cabinets were a whole display of meaty treats. Venison mostly, but some duck & pigeon breast, sausages and burgers of course and lo and behold, some gorgeous wild rabbit, two for a fiver!

Rabbit in the farmed variety is becoming more readily available these days as us Brits wake up to a fact that our continental counterparts have been long aware of. Rabbit is delicious. It’s healthy, lean meat is easy to cook and a tasty alternative to chicken. Wild rabbit on the other hand is a more gamey tasting species, needs a little bit more thought when cooking and is a deeper more flavoursome offering for those of us still hankering for the season past. There are many ways to cook a rabbit and it’s flesh partners well with mustard, prunes and smoky bacon. Slow cooking until the meat is almost falling from the bones or combining with pork or sausage in a casserole, removing the flesh and creating a rich sauce for pasta are all ideal ways to enjoy this plucky little beast. Many recipes call for vigorous washing of the portions prior to cooking but I find preparing it, as it comes, with all it’s natural juices gives a slightly stronger flavour and one that I particularly enjoy. It’ll probably need nearly 2 hours of slow cooking to be at it’s best as it can be ‘sinewy’ when cooked to quickly. In this recipe the flavours are rich and yet there is a subtle lightness more in keeping with current season and all that you are likely to prepare as an accompaniment. Serve it simply with a fresh salad and some crusty bread to mop up the juices, perfect for a spring supper.

Wild rabbit with pancetta & sage


Serves: 4 
  • 1 wild rabbit (whole or butchered) 
  • 2 medium onion 
  • 2 cloves garlic 
  • 1 leek 
  • 1 bay leaf 
  • 100g pancetta cubed 
  • 500ml white wine 
  • 6-8 sage leaves 
  • 1 tbsp flour 
  • 2 tbsp olive oil 
  • 400ml water 
  • Salt & pepper 
Joint the rabbit but retain all unused bones and the carcass. In a large saucepan fry 1 onion, half the leek and a crushed garlic clove in a little olive oil, add the rabbit bones and brown well over a high heat. When nicely browned deglaze the pan with 200ml of white wine, add the bay leaf, season and allow to reduce by half. Now cover all the ingredients with water and boil for 30 mins or so to reduce by half again until you have a rich stock. Strain this stock through a fine sieve and put to one side.

Fry the pancetta cubes in a little olive oil until crisp and golden brown and place to one side on a piece of kitchen paper. Season the flour with salt & pepper and dust the rabbit joints. In the same pan brown the rabbit portions in the pancetta fat (you may need a little more olive oil) and when golden brown put on kitchen paper to one side.

In a heavy casserole dish with a tight fitting lid gently fry the remaining onion, garlic and leek in a little olive oil until softened. Now add the pancetta and rabbit pieces. Pour over the remaining white wine, the reduced rabbit stock you made earlier, tear up some sage leaves and scatter these in to the dish. Season with more salt & pepper and mix and turn the ingredients before covering and placing in the oven for 1 1/2-2 hours until the flesh is tender and almost falling of the bone.

4 May 2010

The contentious issue of cheesecake


A long long time ago in a galaxy far away there was a cook book, a simple, plain & basic cook book by today’s standards but for my mind it was the benchmark for everything that the likes of Jamie, Hugh, Nigel or Nigella have ever done since. It was in essence (and still is as far I’m concerned as I am in possession of my original copy) a family cookbook, everyday meals, from everyday ingredients, midweek meals for the busy family and weekend treats. First published in 1970 as far as I can determine, although my copy is dated 1983, I guess it covered the ground that the new young working family required, fast, tasty, healthy meals that a working mum (and dad) could easily cook, sustaining their offspring and friends whilst keeping them interested at the table and avoiding such delights as Birds Eye ‘boil-in-the-bag’ or Cadbury’s Smash, Fray Bentos steak pies, in a tin! (My maternal grandmother was rather partial to one of those though) or god-forbid Findus crispy (un)savoury pancakes!

Not only do I remember these meals with fond affection, I remember that as a family we loved them, they were served for suppers, lunches, dinner parties and I still cook some of them today, I might have adapted them slightly, but mostly I cook them just how they were written. Sweet & sour ribs, the recipe for red cabbage is unchanged, chicken liver pate, barbecued beef (sweet and delicious with celery and green peppers) and of course baked cheesecake. It was the book that got my brothers and I interested in food and ultimately got us cooking. My 1983 copy coincided with moving into my first flat and became a constant feature in my first kitchen. The book was written by a long time friend of my mothers’,Elaine Hallgarten and co-authored by her long time friend Dorothy Brown, then came a string of other books, Mince Matters, Cooking with Yoghurt and The Jaffa Cookbook, but this book was called Cookery Do. I will and have already, in a spiritual sense, pass this book on to my friends and children and hope they’ll continue to cook these simple tasty recipes for as long as I have.

Back to cheesecake, cheese, being the operative word here. There are many recipes for cheesecake, some baked, some not, some set with gelatine others with eggs. The key thing here for me is the cheese. I have always favoured the traditional Jewish baked cheesecake. The one they serve in the Brick Lane Bagel Bake, the one you get from a street corner deli in Manhattan, the one my mother makes, the one in Cookery Do. It’s simple, it’s delightful and it’s delicious. Eggs, Lemon, Sugar and the vital ingredient, curd cheese. Curd cheese is similar to cream cheese but with a lower fat content. It has a slight acidity and a light flavour, colour and texture which is ideal for cheesecake. You can usually find it in Polish shops, supermarket deli counters (sometimes known as medium fat cream cheese) and even have it delivered from my favourite supplier of Devon Gold soft Curd Cheese Langage farm. When baked in the recipe here your cheesecake will have a texture like no other. Philadelphia is meant for sandwiches, and jolly good it is too, not cheesecake, I know it’s contentious, but it’s true!


Classic baked cheesecake 


Serves: 10 slices
  • 500g curd cheese 
  • 4 eggs 
  • 250g caster sugar 
  • 1 lemon juiced & zested 
  • 8 digestive biscuits 
  • 50g butter 
Preheat oven to 175 degrees

Break the digestive biscuits into coarse crumbs and place in a small saucepan. Melt the butter into the biscuit-crumb over a low heat until completely absorbed. Press the biscuit mixture into the base of a well buttered cake tin (with a removable bottom) and press down to form the base of the cake with the back of a spoon. The base should be smooth and level on the surface but not too compact, as this will make the base dense. When done place the tin in the fridge for 20mins to ‘set’ the base.

Mix the curd cheese, eggs, sugar, lemon zest and lemon juice in a large bowl with a balloon whisk until you have a creamy bubbly mixture.

Remove the cake tin from the fridge and place on a baking tray. Carefully pour in the cheesecake mixture taking care not to disturb the biscuit base. Gently place in the middle of the oven and bake for 30-45 mins.

When cooked the cake will have slightly coloured on top and the mixture will still wobble slightly in the centre. Don’t worry about this, as it will firm up as it cools. When it is at this stage turn the oven off and open the door about 15 cm leaving the cake inside and allow it to cool for an hour or so. This will help prevent splits appearing in the surface and continue to cook the cake.

Best made the day before and refrigerated overnight.

These quantities will exactly fill a 200mm diameter x 50mm deep cake tin.